Table of Contents
Mobile Inspector App User Guide 📱

Overview
The HOALife Mobile Inspector app is utilized while inspecting an association in its entirety. Completing an inspection on the app triggers the violations enforcement process through the creation of the Violation Notices and Inspection Summary Reports. This easy-to-use app allows you to Ditch the Clipboard™ and become a violations enforcement champion. 🥇
This guide will go into detail on the three main steps in the inspection process on the HOALife Mobile Inspector app:
- Step 1 - Preparing For Inspections
- Step 2 - Inspecting
- Step 3 - Finalizing Inspections
For best results, you will want to Prepare and Finalize inspections while on WiFi (best) or on a strong and fast cellular network connection. More details on this can be found below.
Getting Started
The first thing you need to do is get your phone ready and install the HOALife Inspector app.
- For best results, please be sure your phone is updated to the latest version of your iOS or Android operating system.
- Download the HOALife Inspector app from the Apple App Store or the Google Play Store. Please be sure to always stay updated to the latest version of the app.
- Launch and Log In to the HOALife Inspector app. You will only see the Login Screen the first time using the app.

Step 1 - Preparing For Inspections
Now that you have the HOALife Mobile Inspector app installed and running, let's prepare for your first inspection! This first step involves loading the Association data (properties, notes, previous violations, etc) into the app to ready the Association for inspection.
- On the Queue Association screen, you will see a listing of all Associations that you are authorized to inspect. You will also be able to see the date of the last inspection for each Association. You can locate the desired Association by scrolling down the list or can enter the name of the Association in the search box at the top. Utilize the
+ Queuebutton to load the Association into the inspection queue.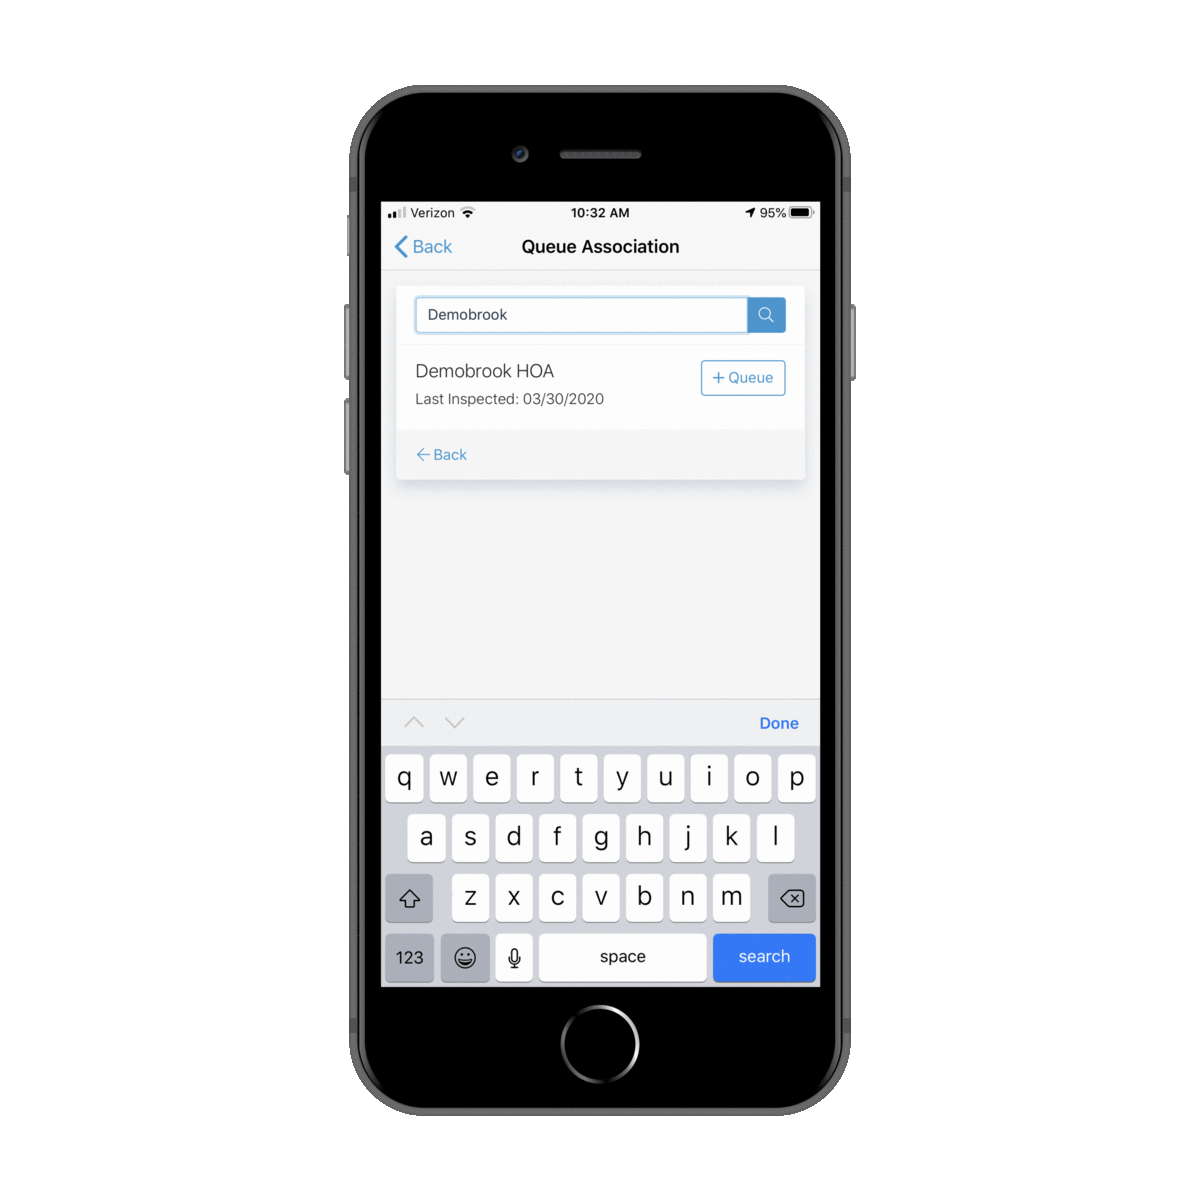
- You will now view the list of Queued Associations. You will notice some useful information about each association listed including the date of last inspection, the number of properties in the Association and, perhaps most importantly, the date/time of the last update to the Association. If too much time passes between the moment the Association is loaded into the Association Queue and the time of inspection, the data may become stale and not include the most recent notes, previous violations, owner violation responses, and other useful information. You can avoid this by clicking
Update Associationin the menu if the Association has been in the system for a while.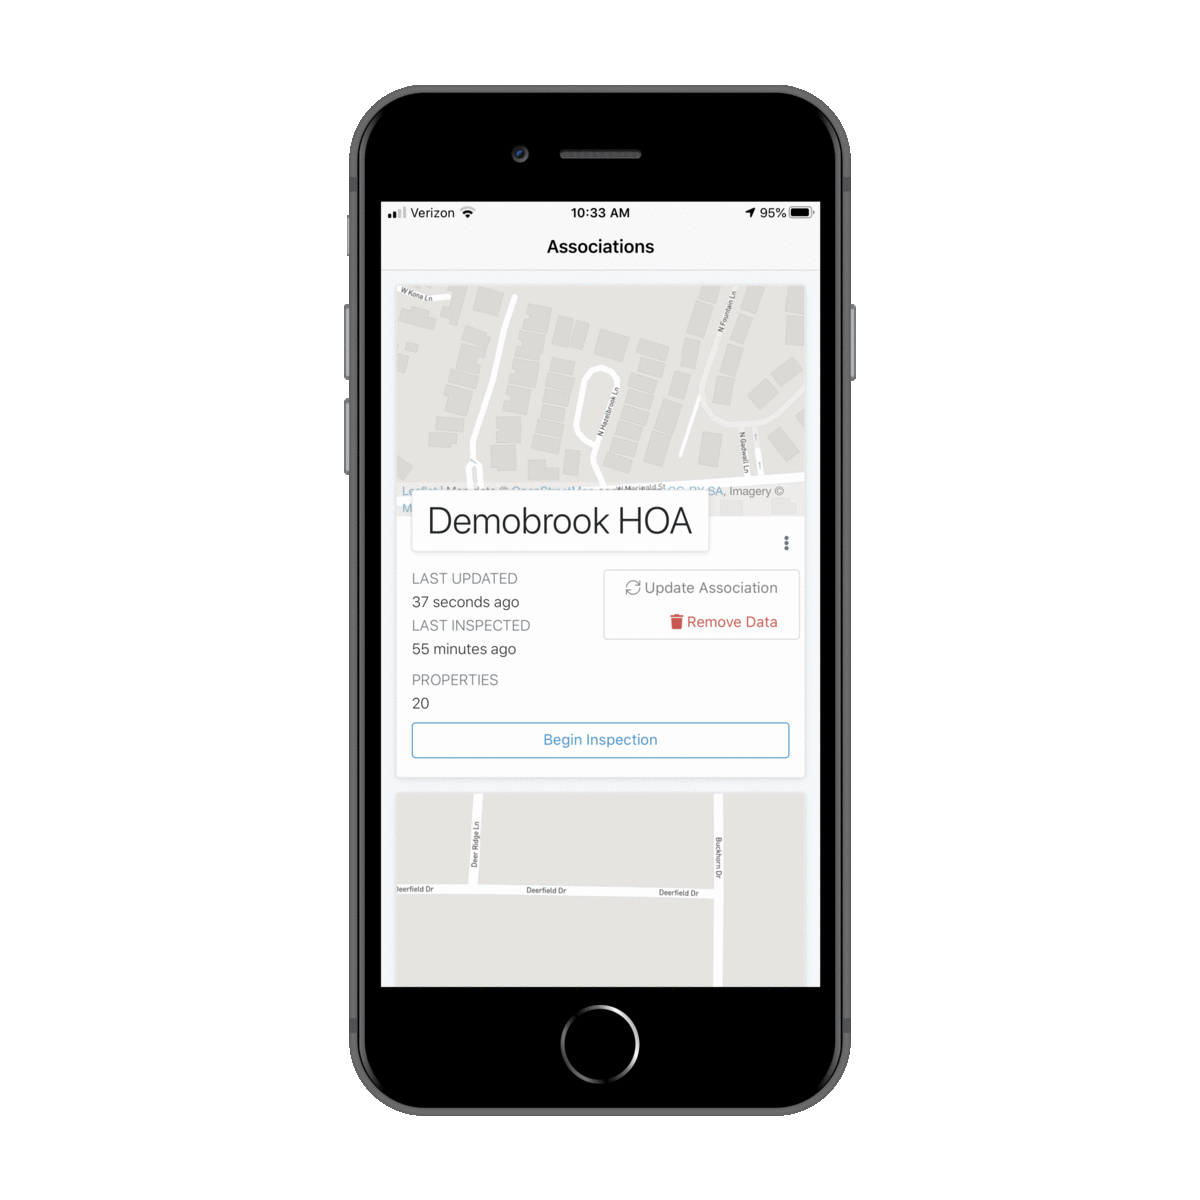
- Add additional Associations to Queue as desired by scrolling down to the
+ Queue Association buttonat the bottom of the list of Queued Associations. Should you wish to remove an Association from the Association Queue, simply clickRemove Datain the menu. - You're ready to Inspect! 👏
Step 2 - Inspecting
Now that you've loaded one or more Associations to your Queue, you can inspect. Let's begin!
- Once you arrive at the Association and are ready, you can
Begin Inspection.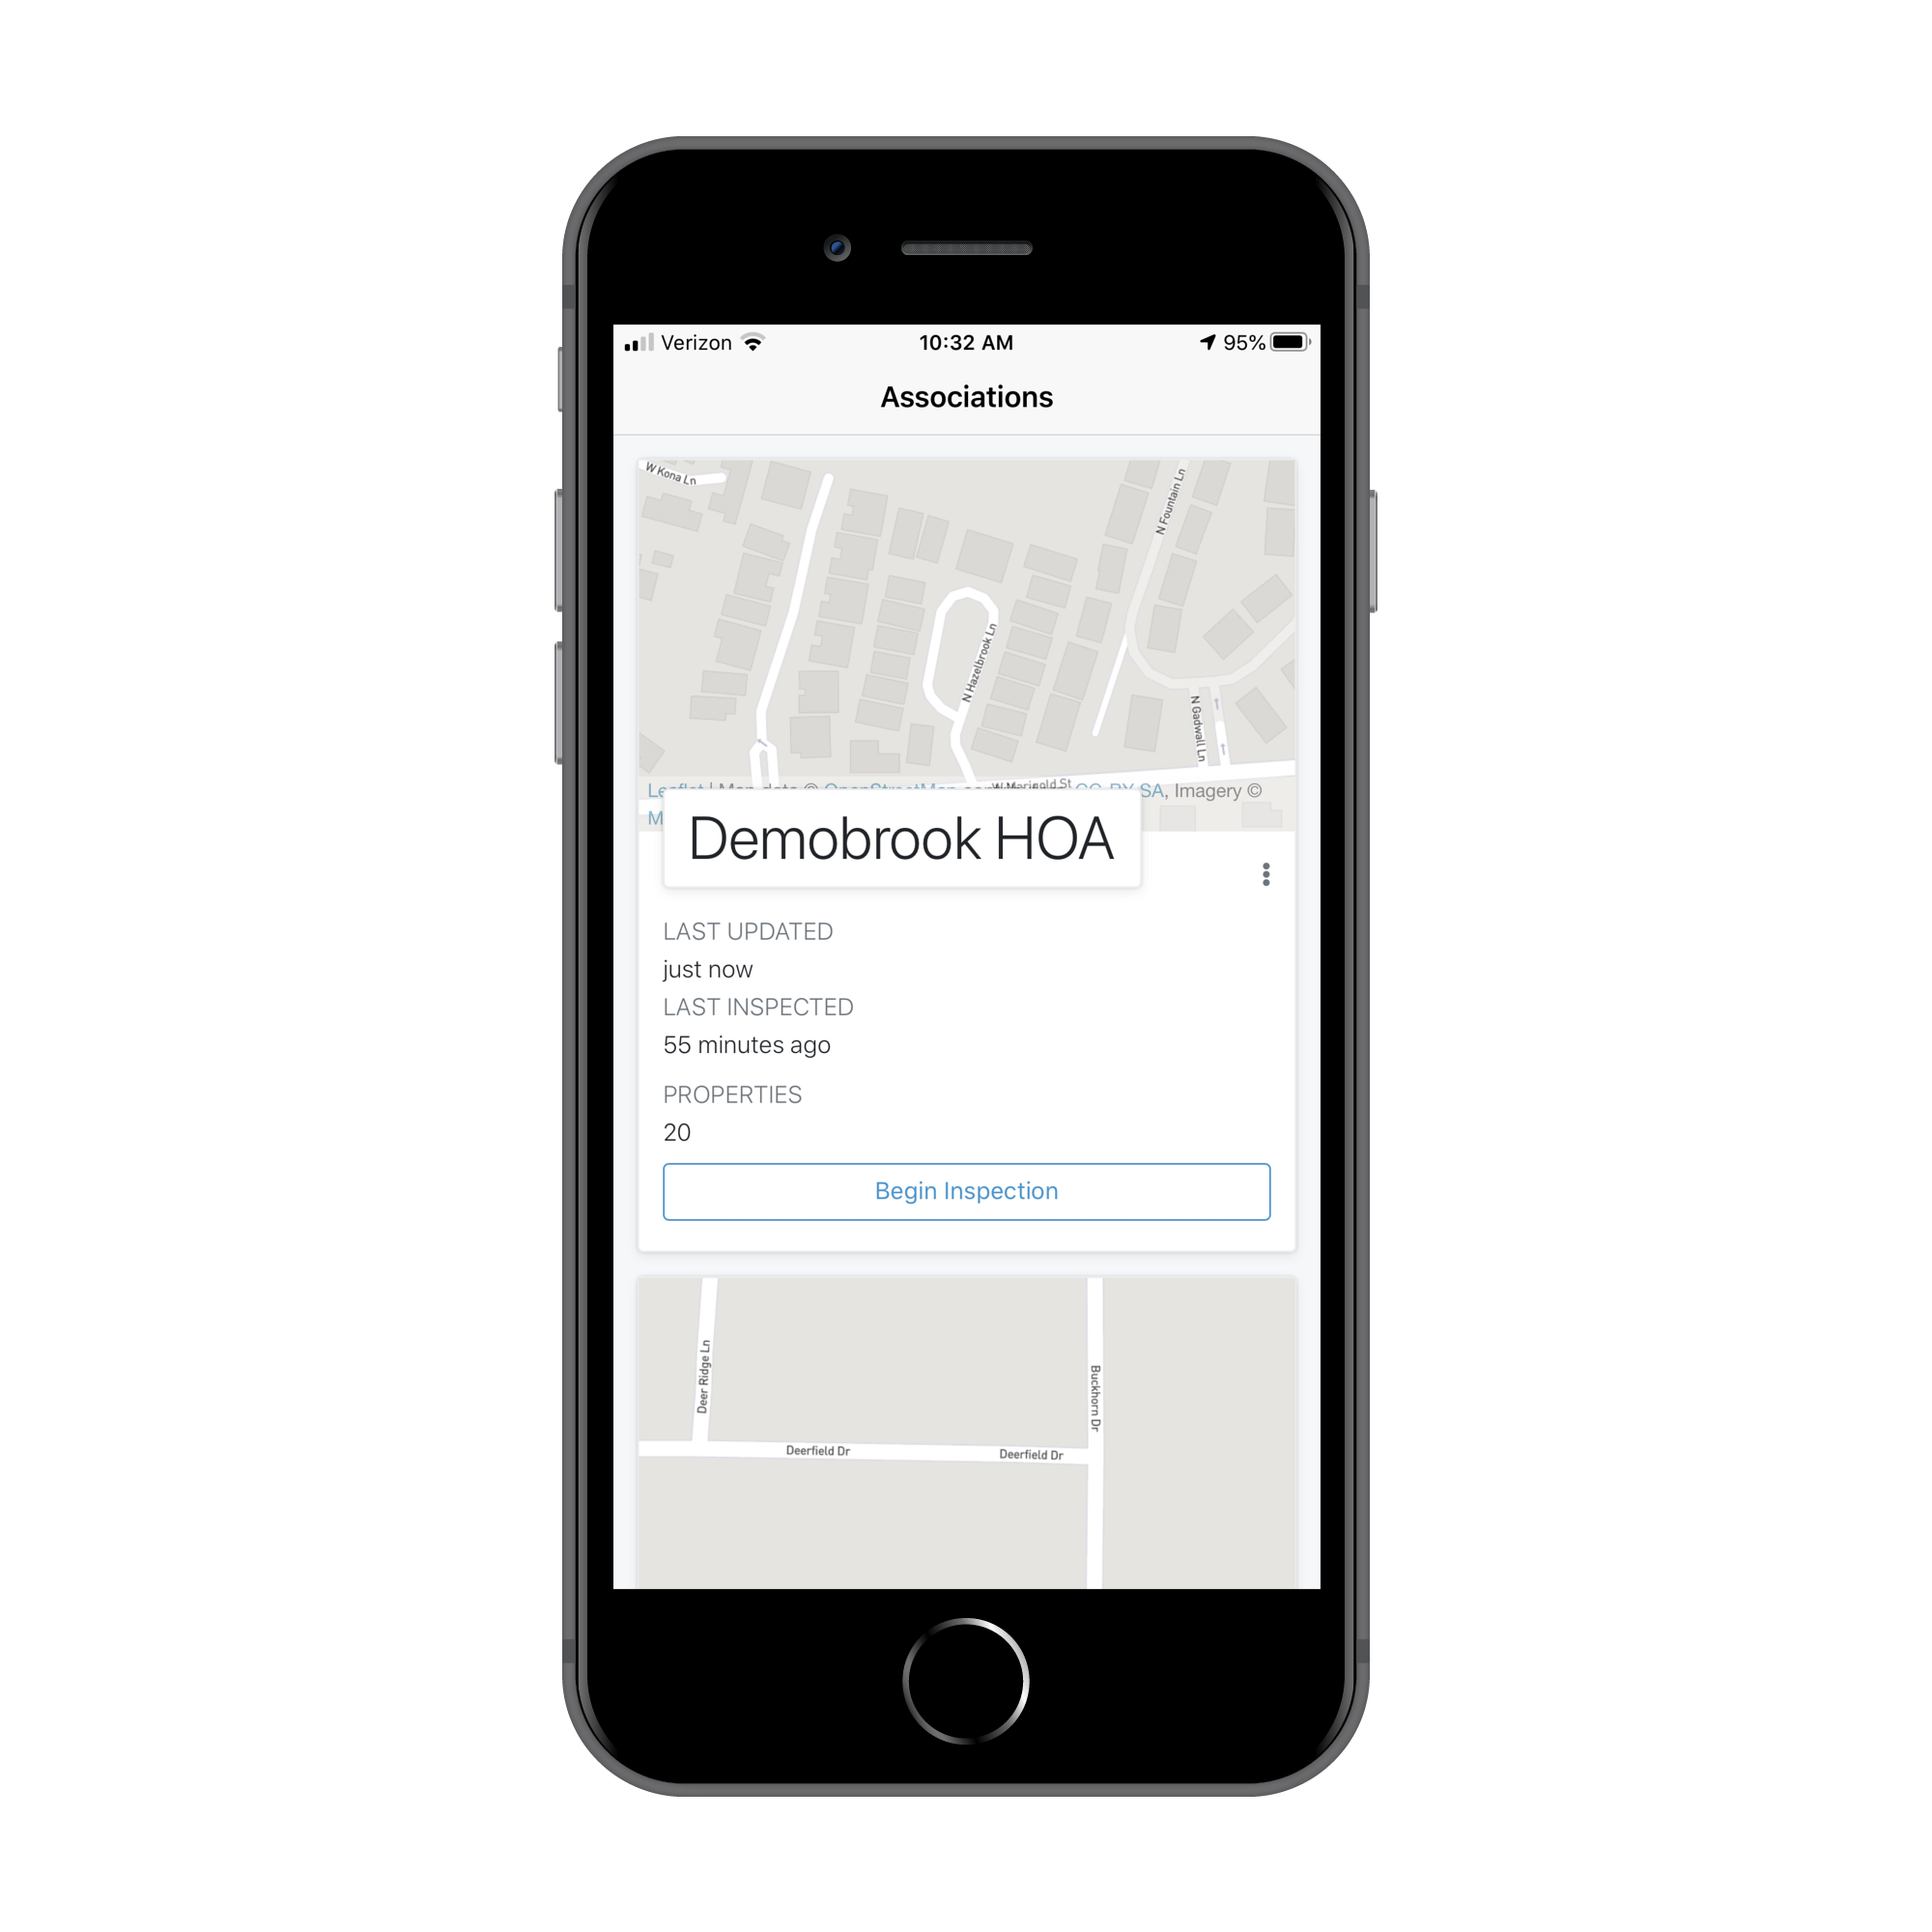
- When you enter the inspection you will see the routes within the Association. Each street within the Association is generally an individual route. Long or complicated streets may be broken into multiple routes during set-up in the Dashboard. Using your phone's GPS location (if available), the app will list the routes nearst to your current location.
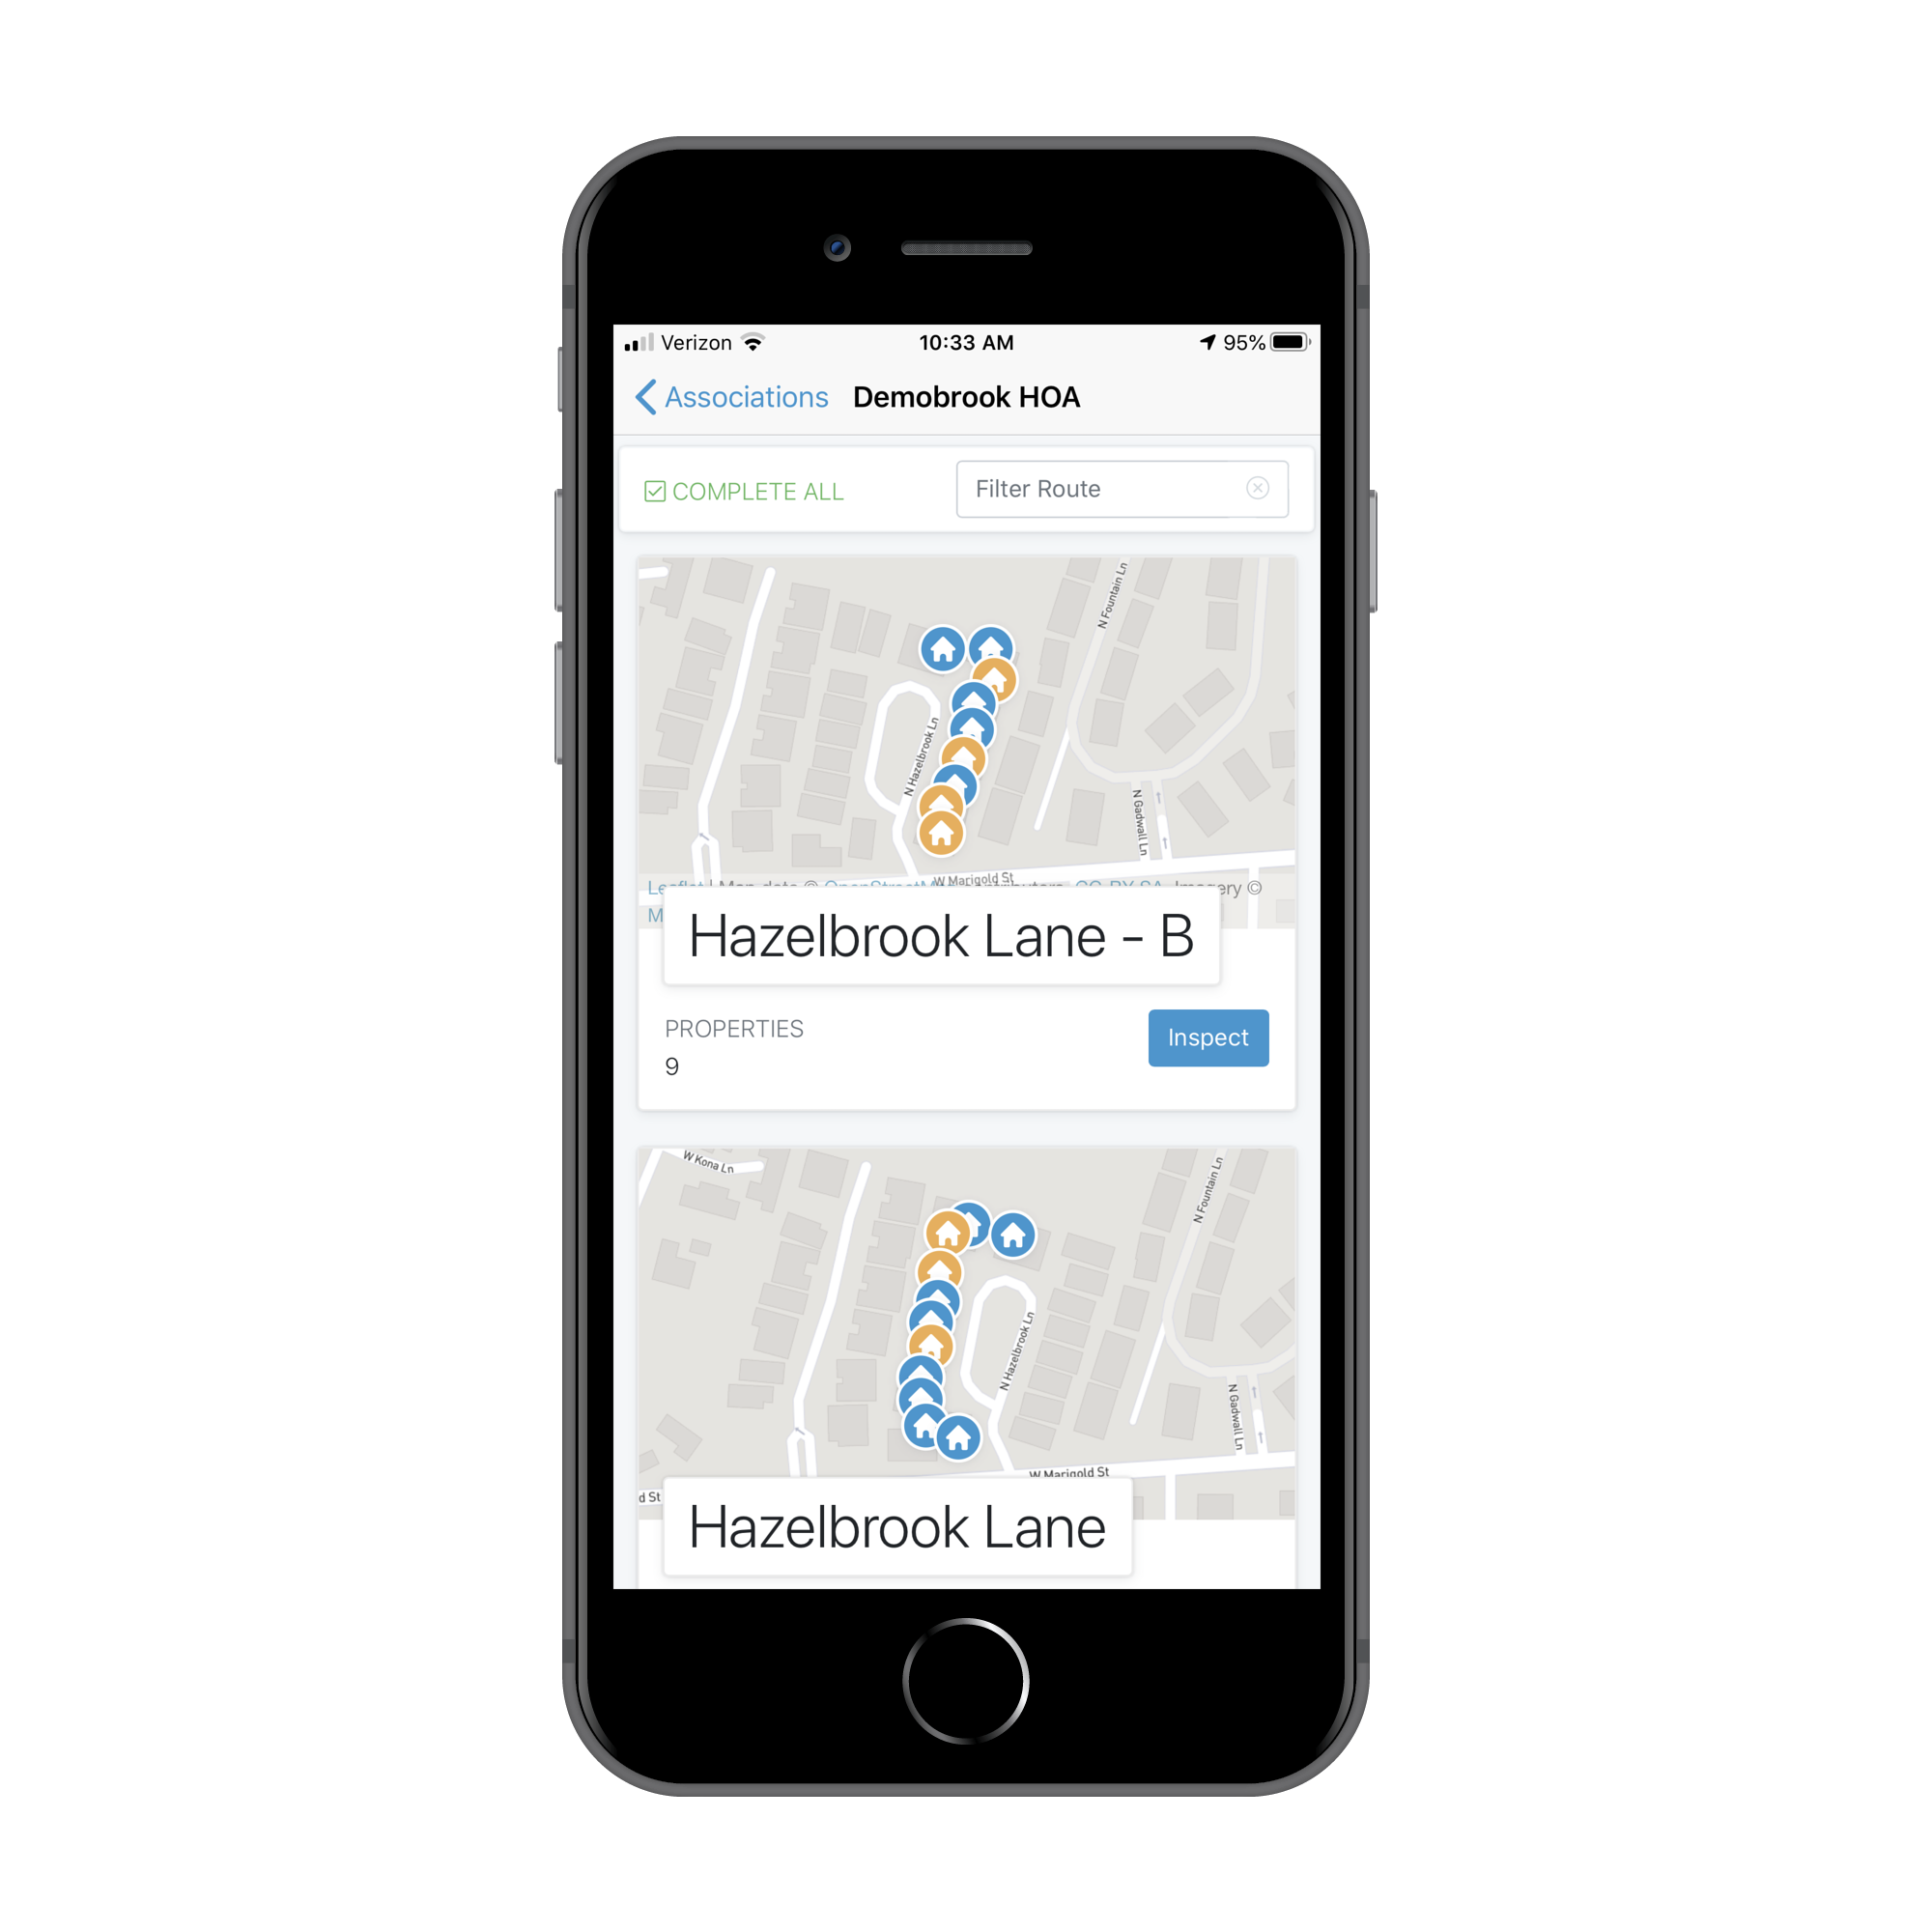
- Select the appropriate route from the list by scrolling or utilizing the Filter Route search box and click
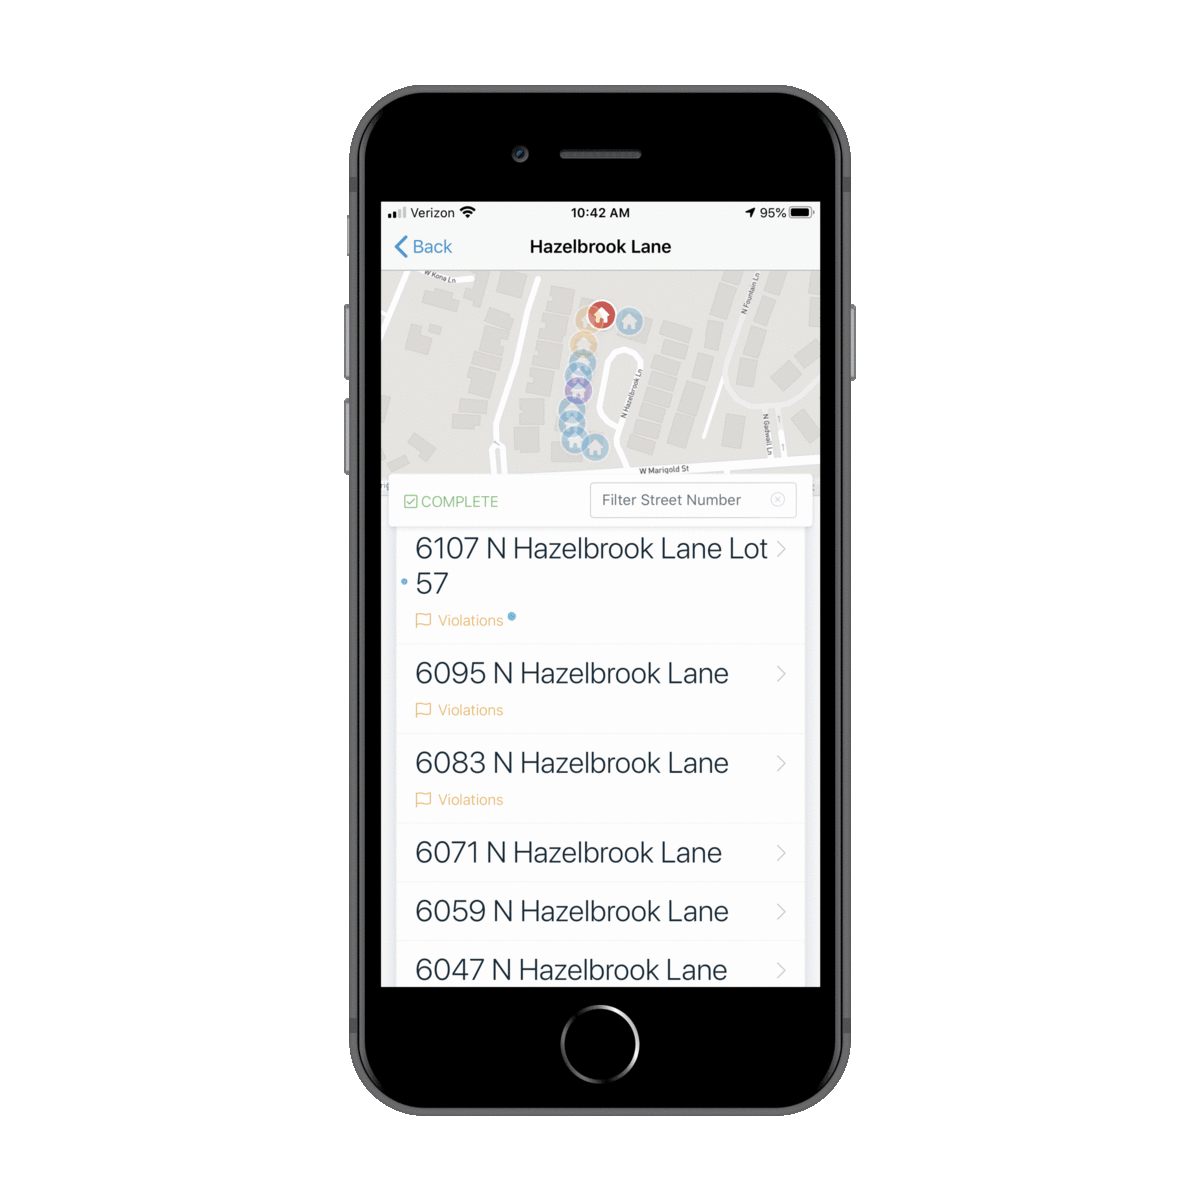
Inspect. - You will now see a list of the properties contained within the route. Select the property with an observed violation that you wish to record. You can utilize the Filter Street Number box to save time if desired.
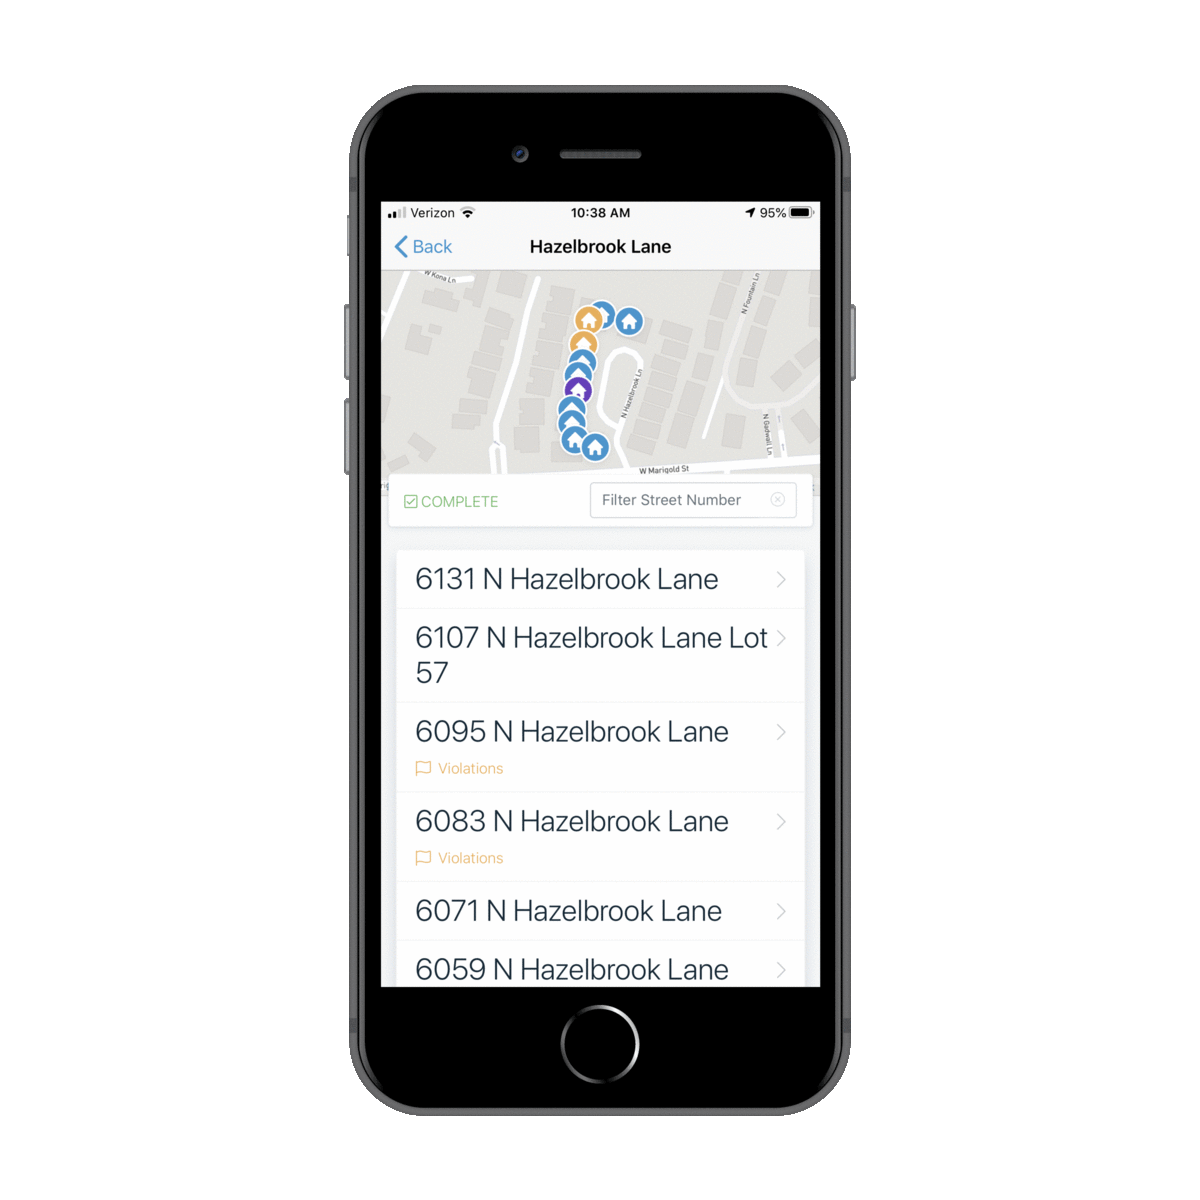
- Within the property view, there are tabs to view the Details of the property, previous and current Violations, and any pinned property Notes.

- To enter an observed violation, click the blue
+button at the bottom right of the screen. - The violation modal will appear and is populated with the appropriate violation types for the Association. Select the desired violation type, enter any comments desired and add photos. Then click the
+ Add Violationbutton to record the violation. The system knows if this is a repeat occurrence of the violation and will pair the appropriate notice automatically. No further action is required on your part.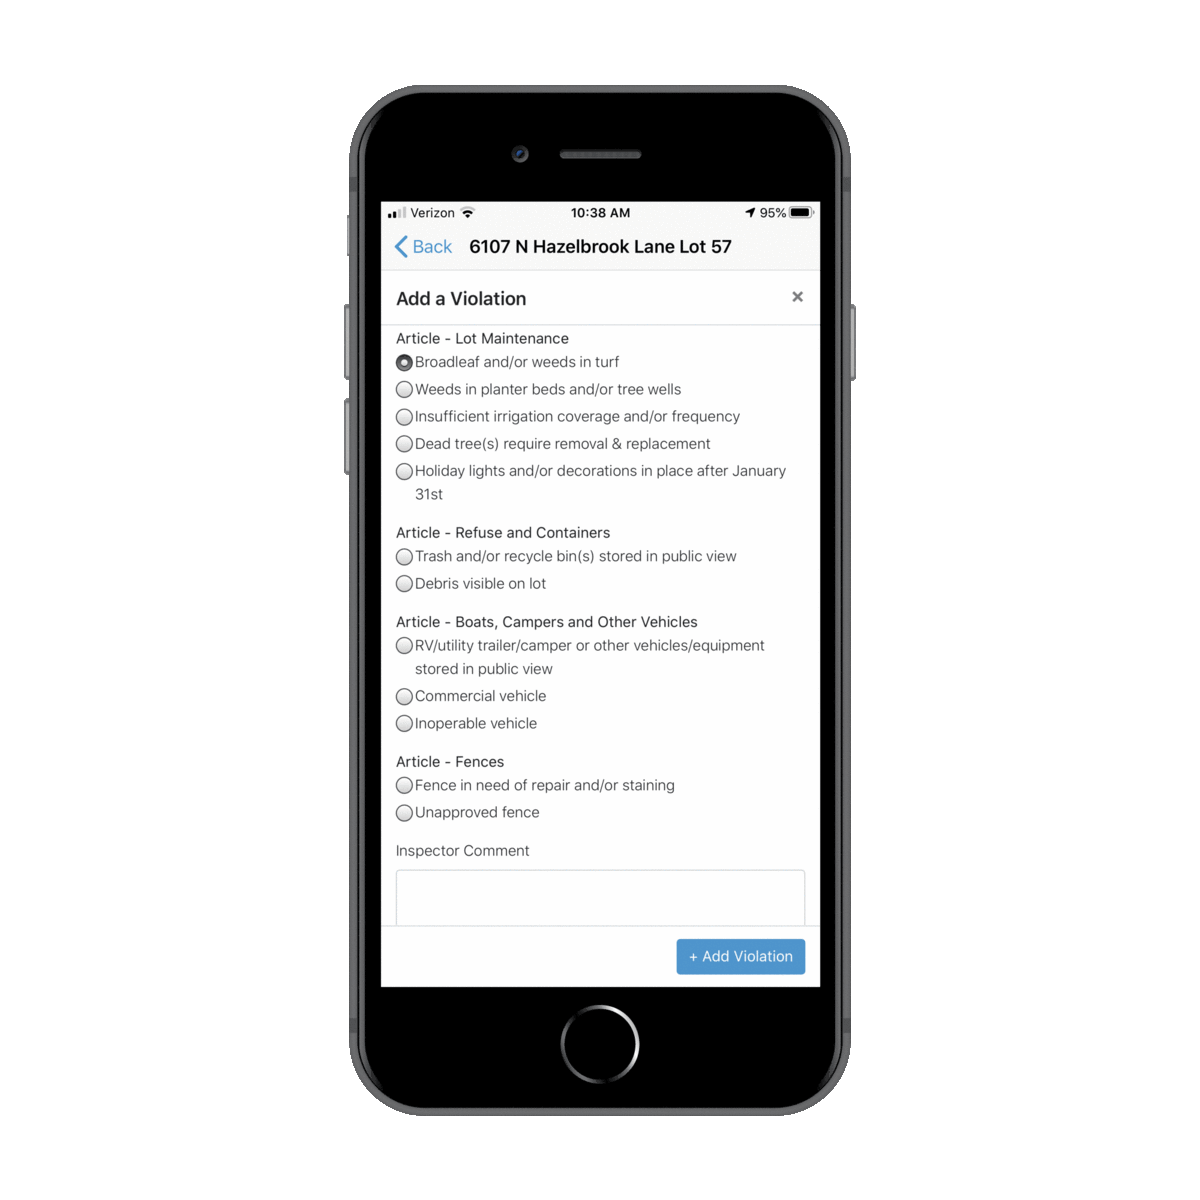
- Click on the
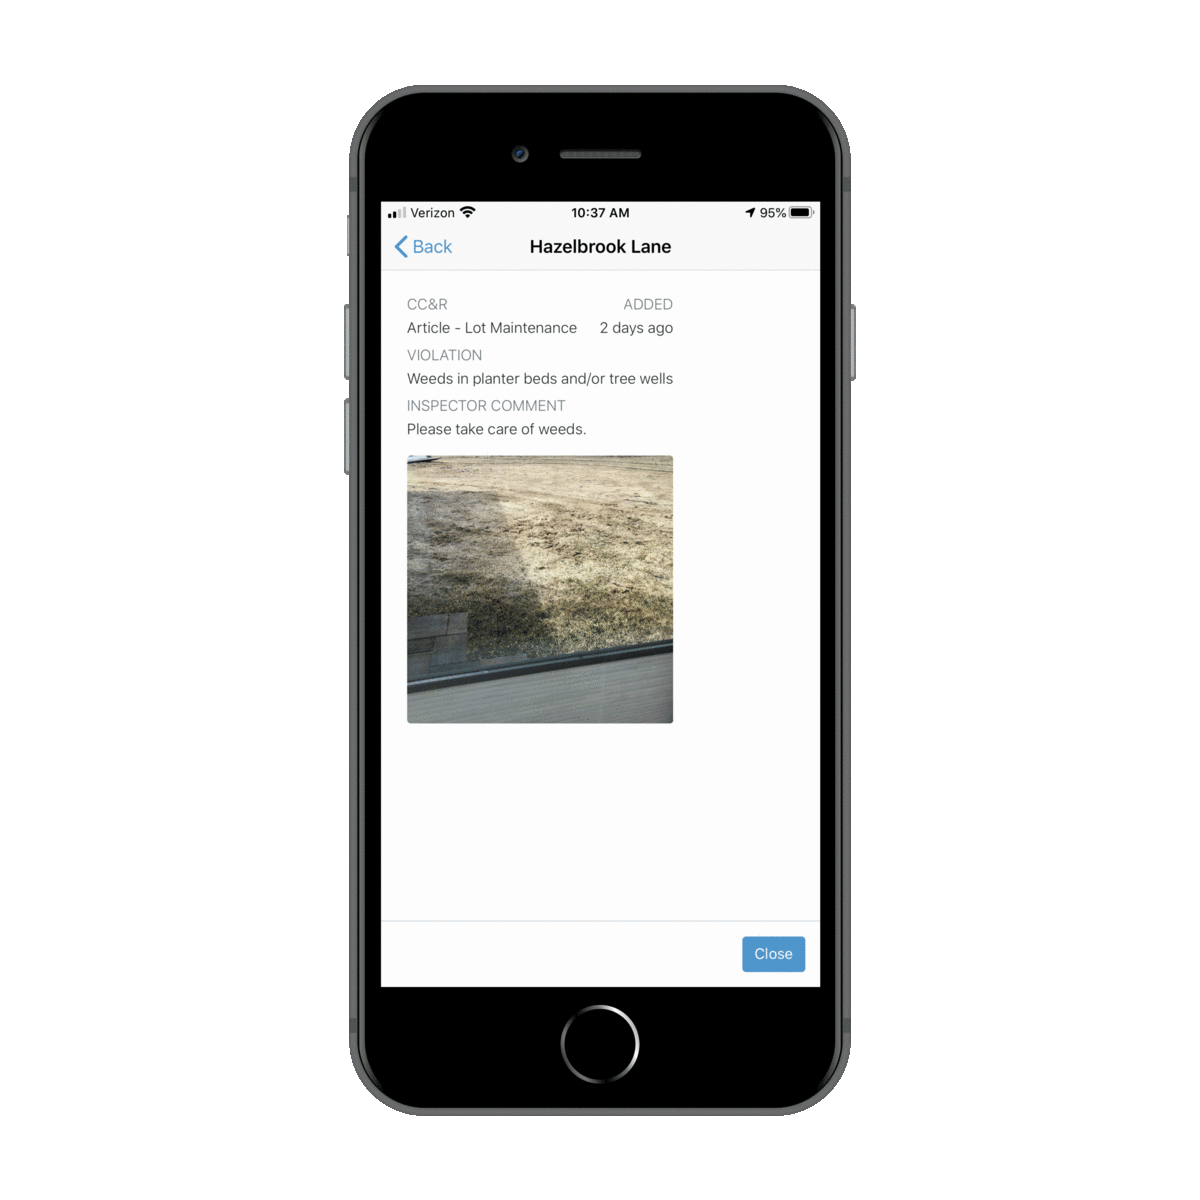
< Backbutton at the top left to return to the route view. - You can gain valuable insights by clicking on the Violations and Notes buttons that appear below relevant property addresses.
- Continue selecting properties to record any observed violations. When there are no more violations to record, click
COMPLETEand then clickOkto confirm completion of the route. Need to add a second violation to a property? Simply click the+and add it in the same manner as the first violation.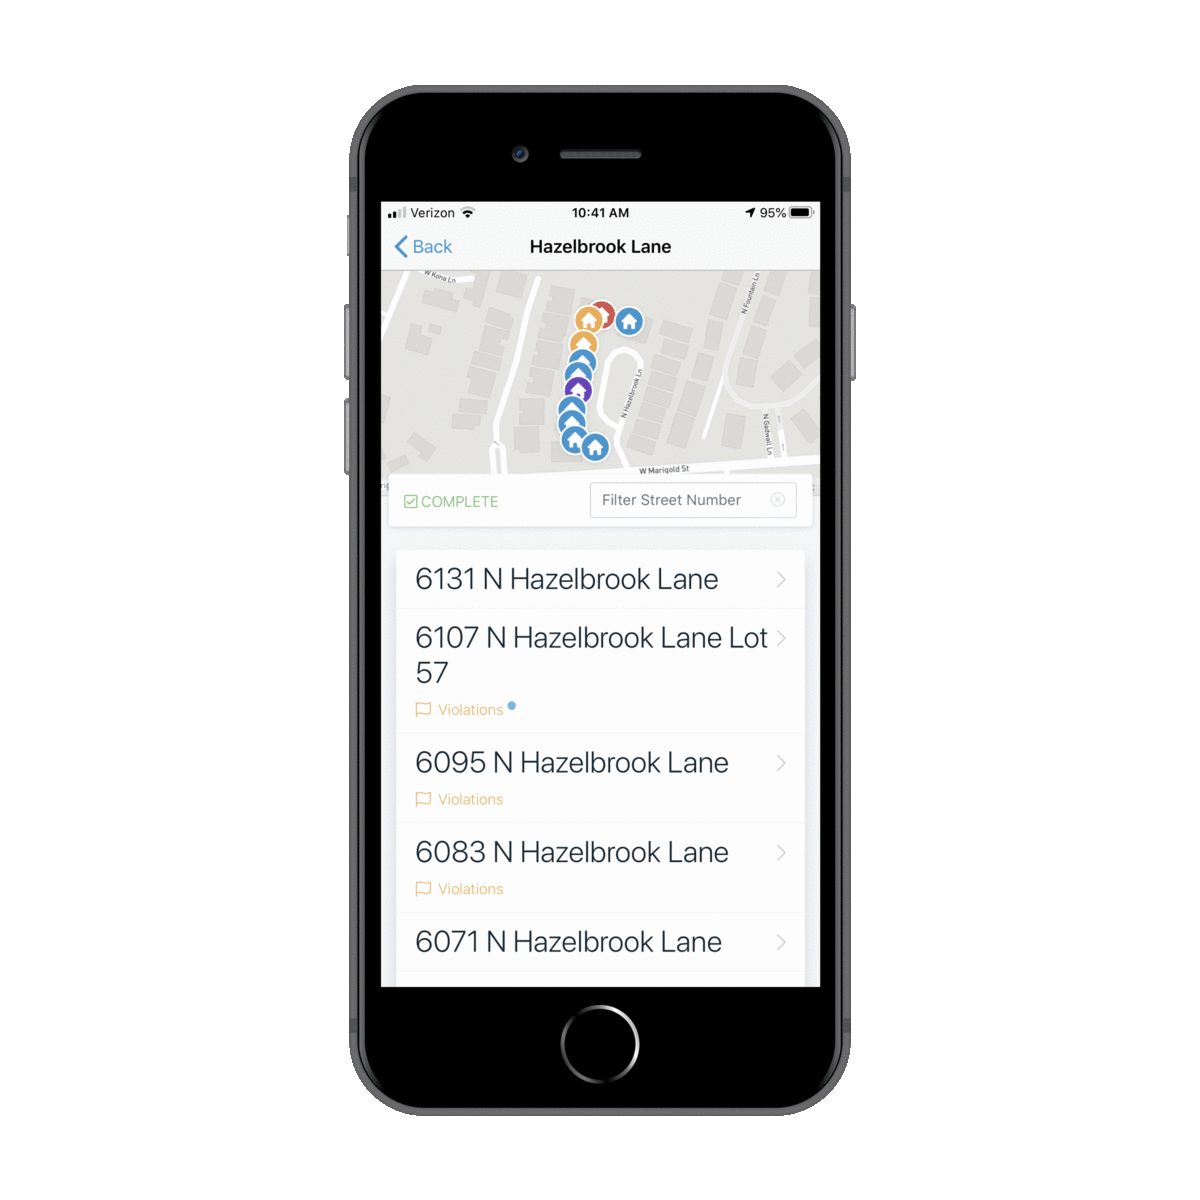
- Congratulations, you have completed the inspection of a route! Now continue your inspection by selecting the next route and repeat the process until all routes have been inspected.
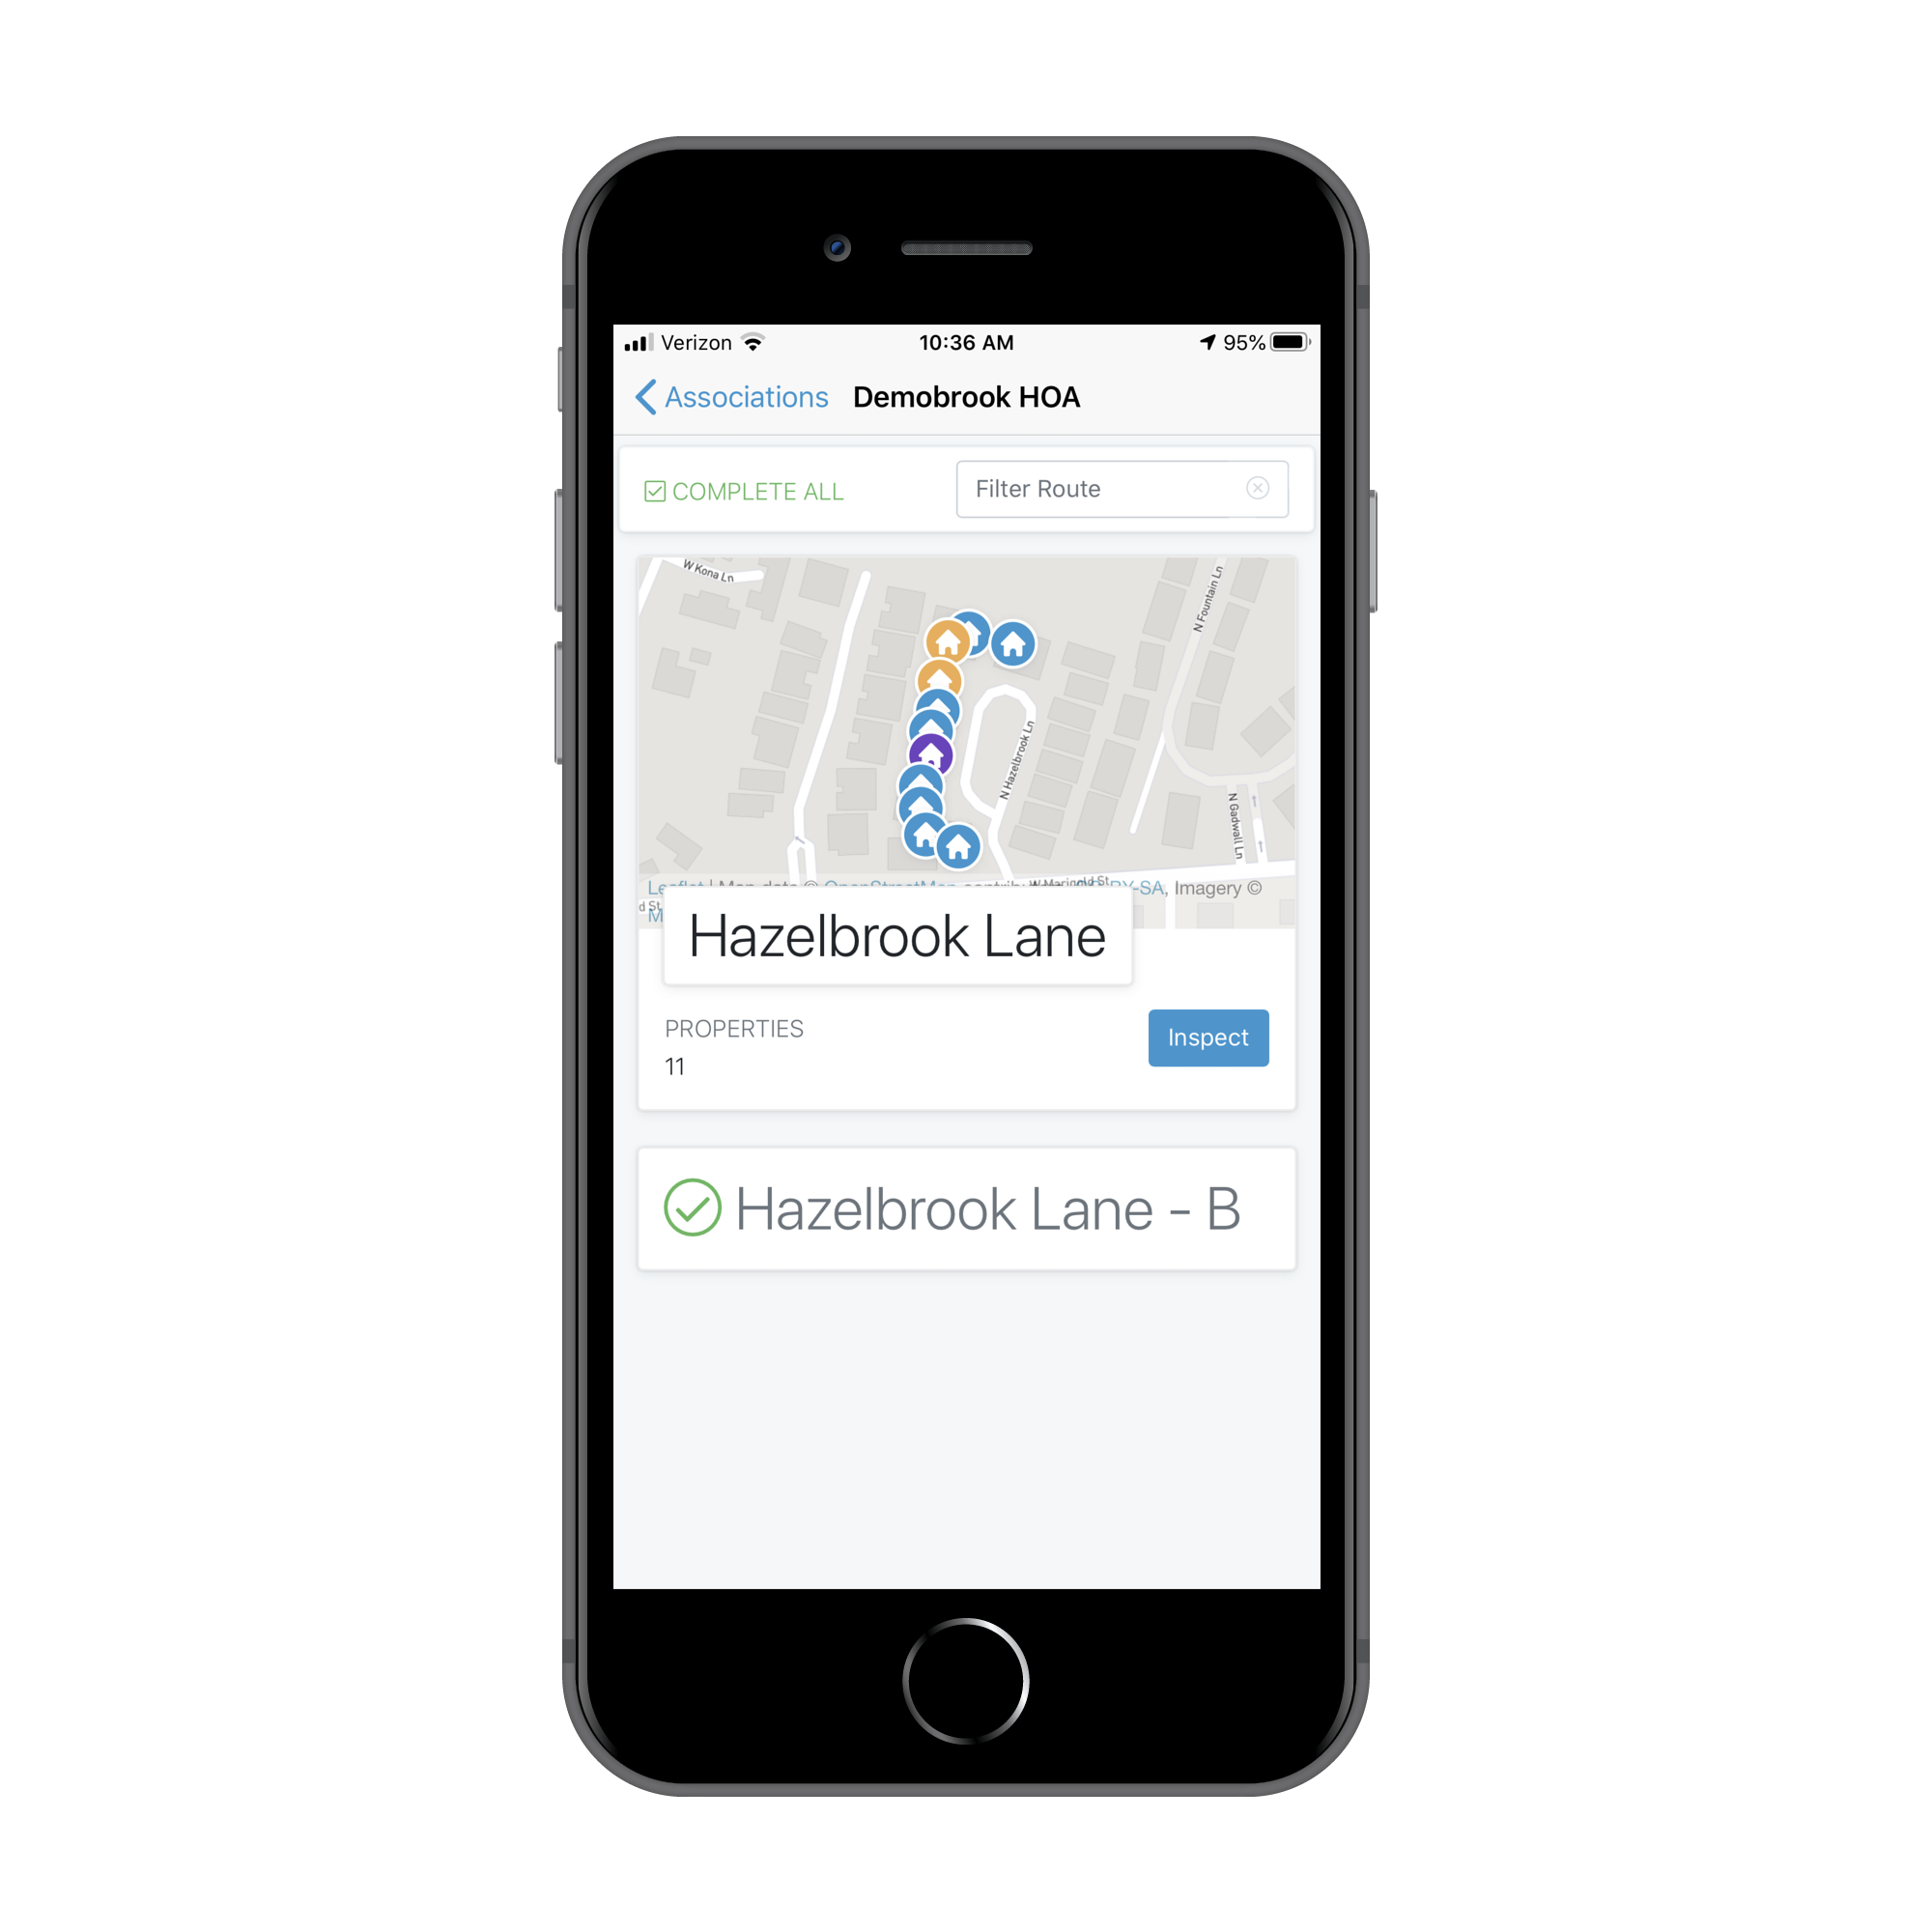
- The icons on the map have a purpose! Clicking on any house icon highlights the property in the address list with a blue dot to the left of the address. This is super useful when house numbers are not visible. The colors of the house icons have meaning: Blue means property without a previous or current violation or note; Purple means Note pinned to property; Red means new violation recorded on this inspection for property.; Orange means previous violation for property.
- You can always go back to the Association Queue prior to completing the inspection. You then have the option to
Continue InspectionorAbandon Inspection. If you abandon the inspection, all new violations will be removed and all progress will be lost. Let's continue...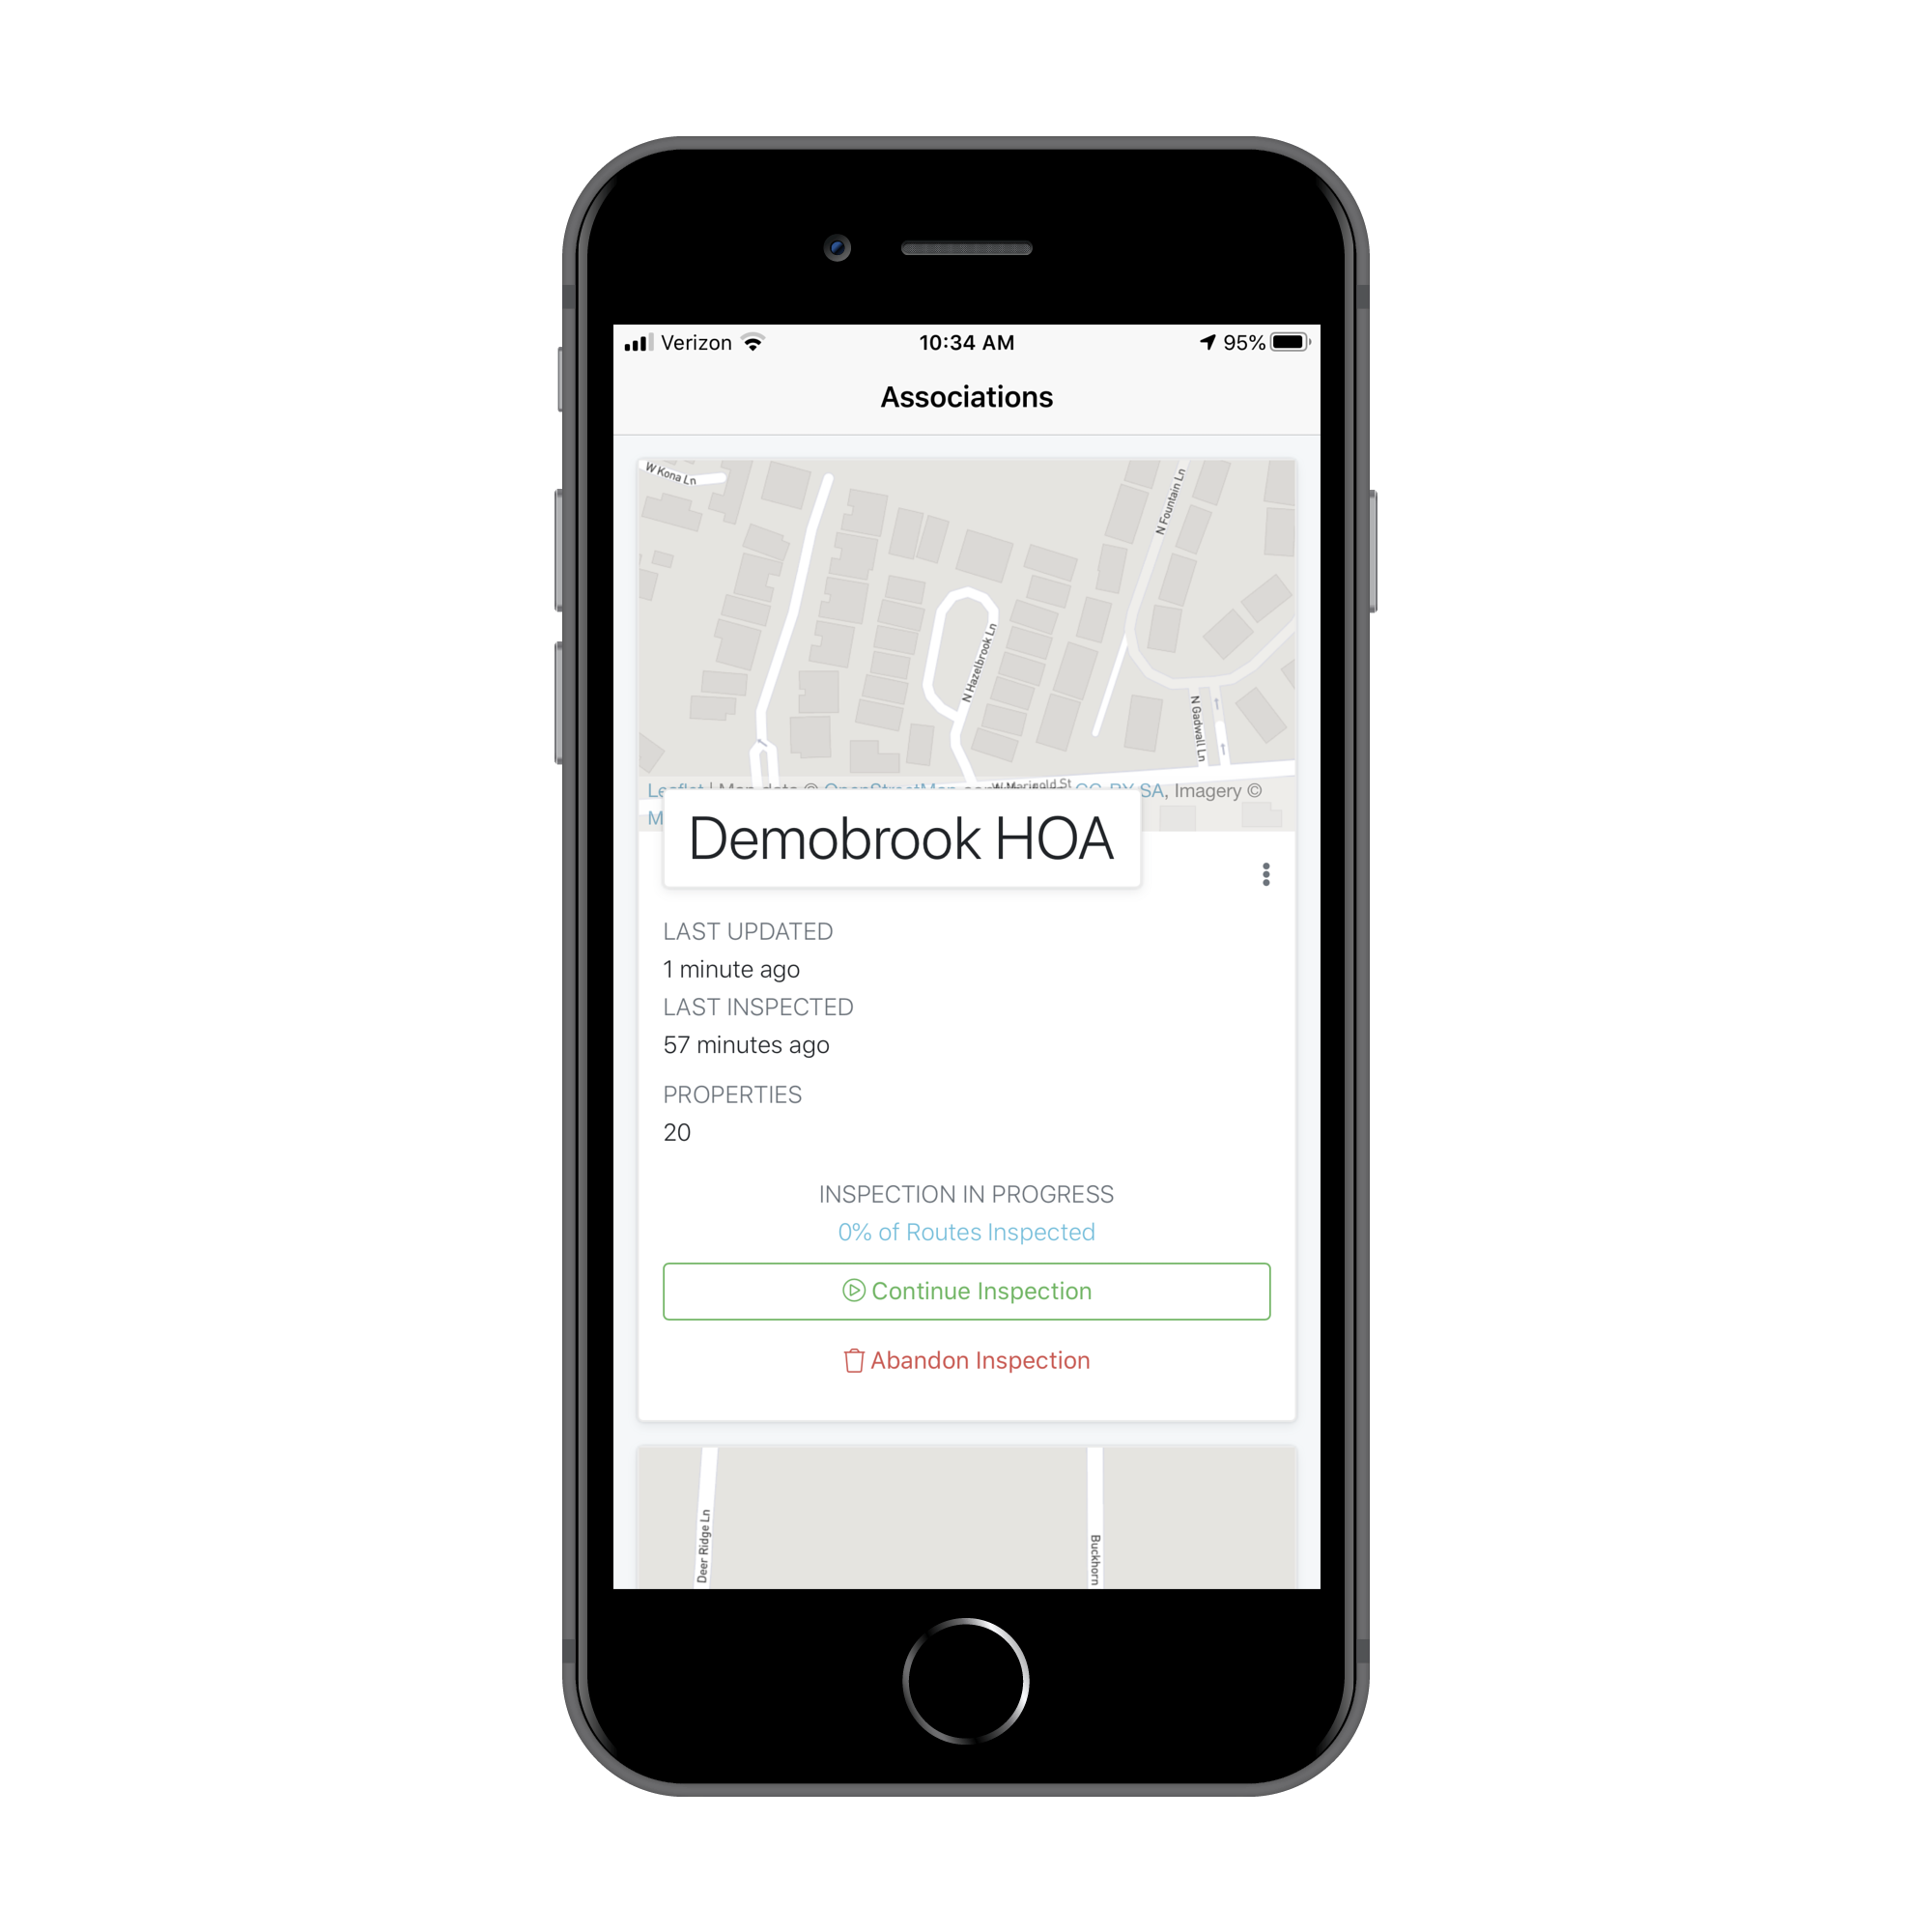
- Once all routes have been completed, click
Complete Inspection.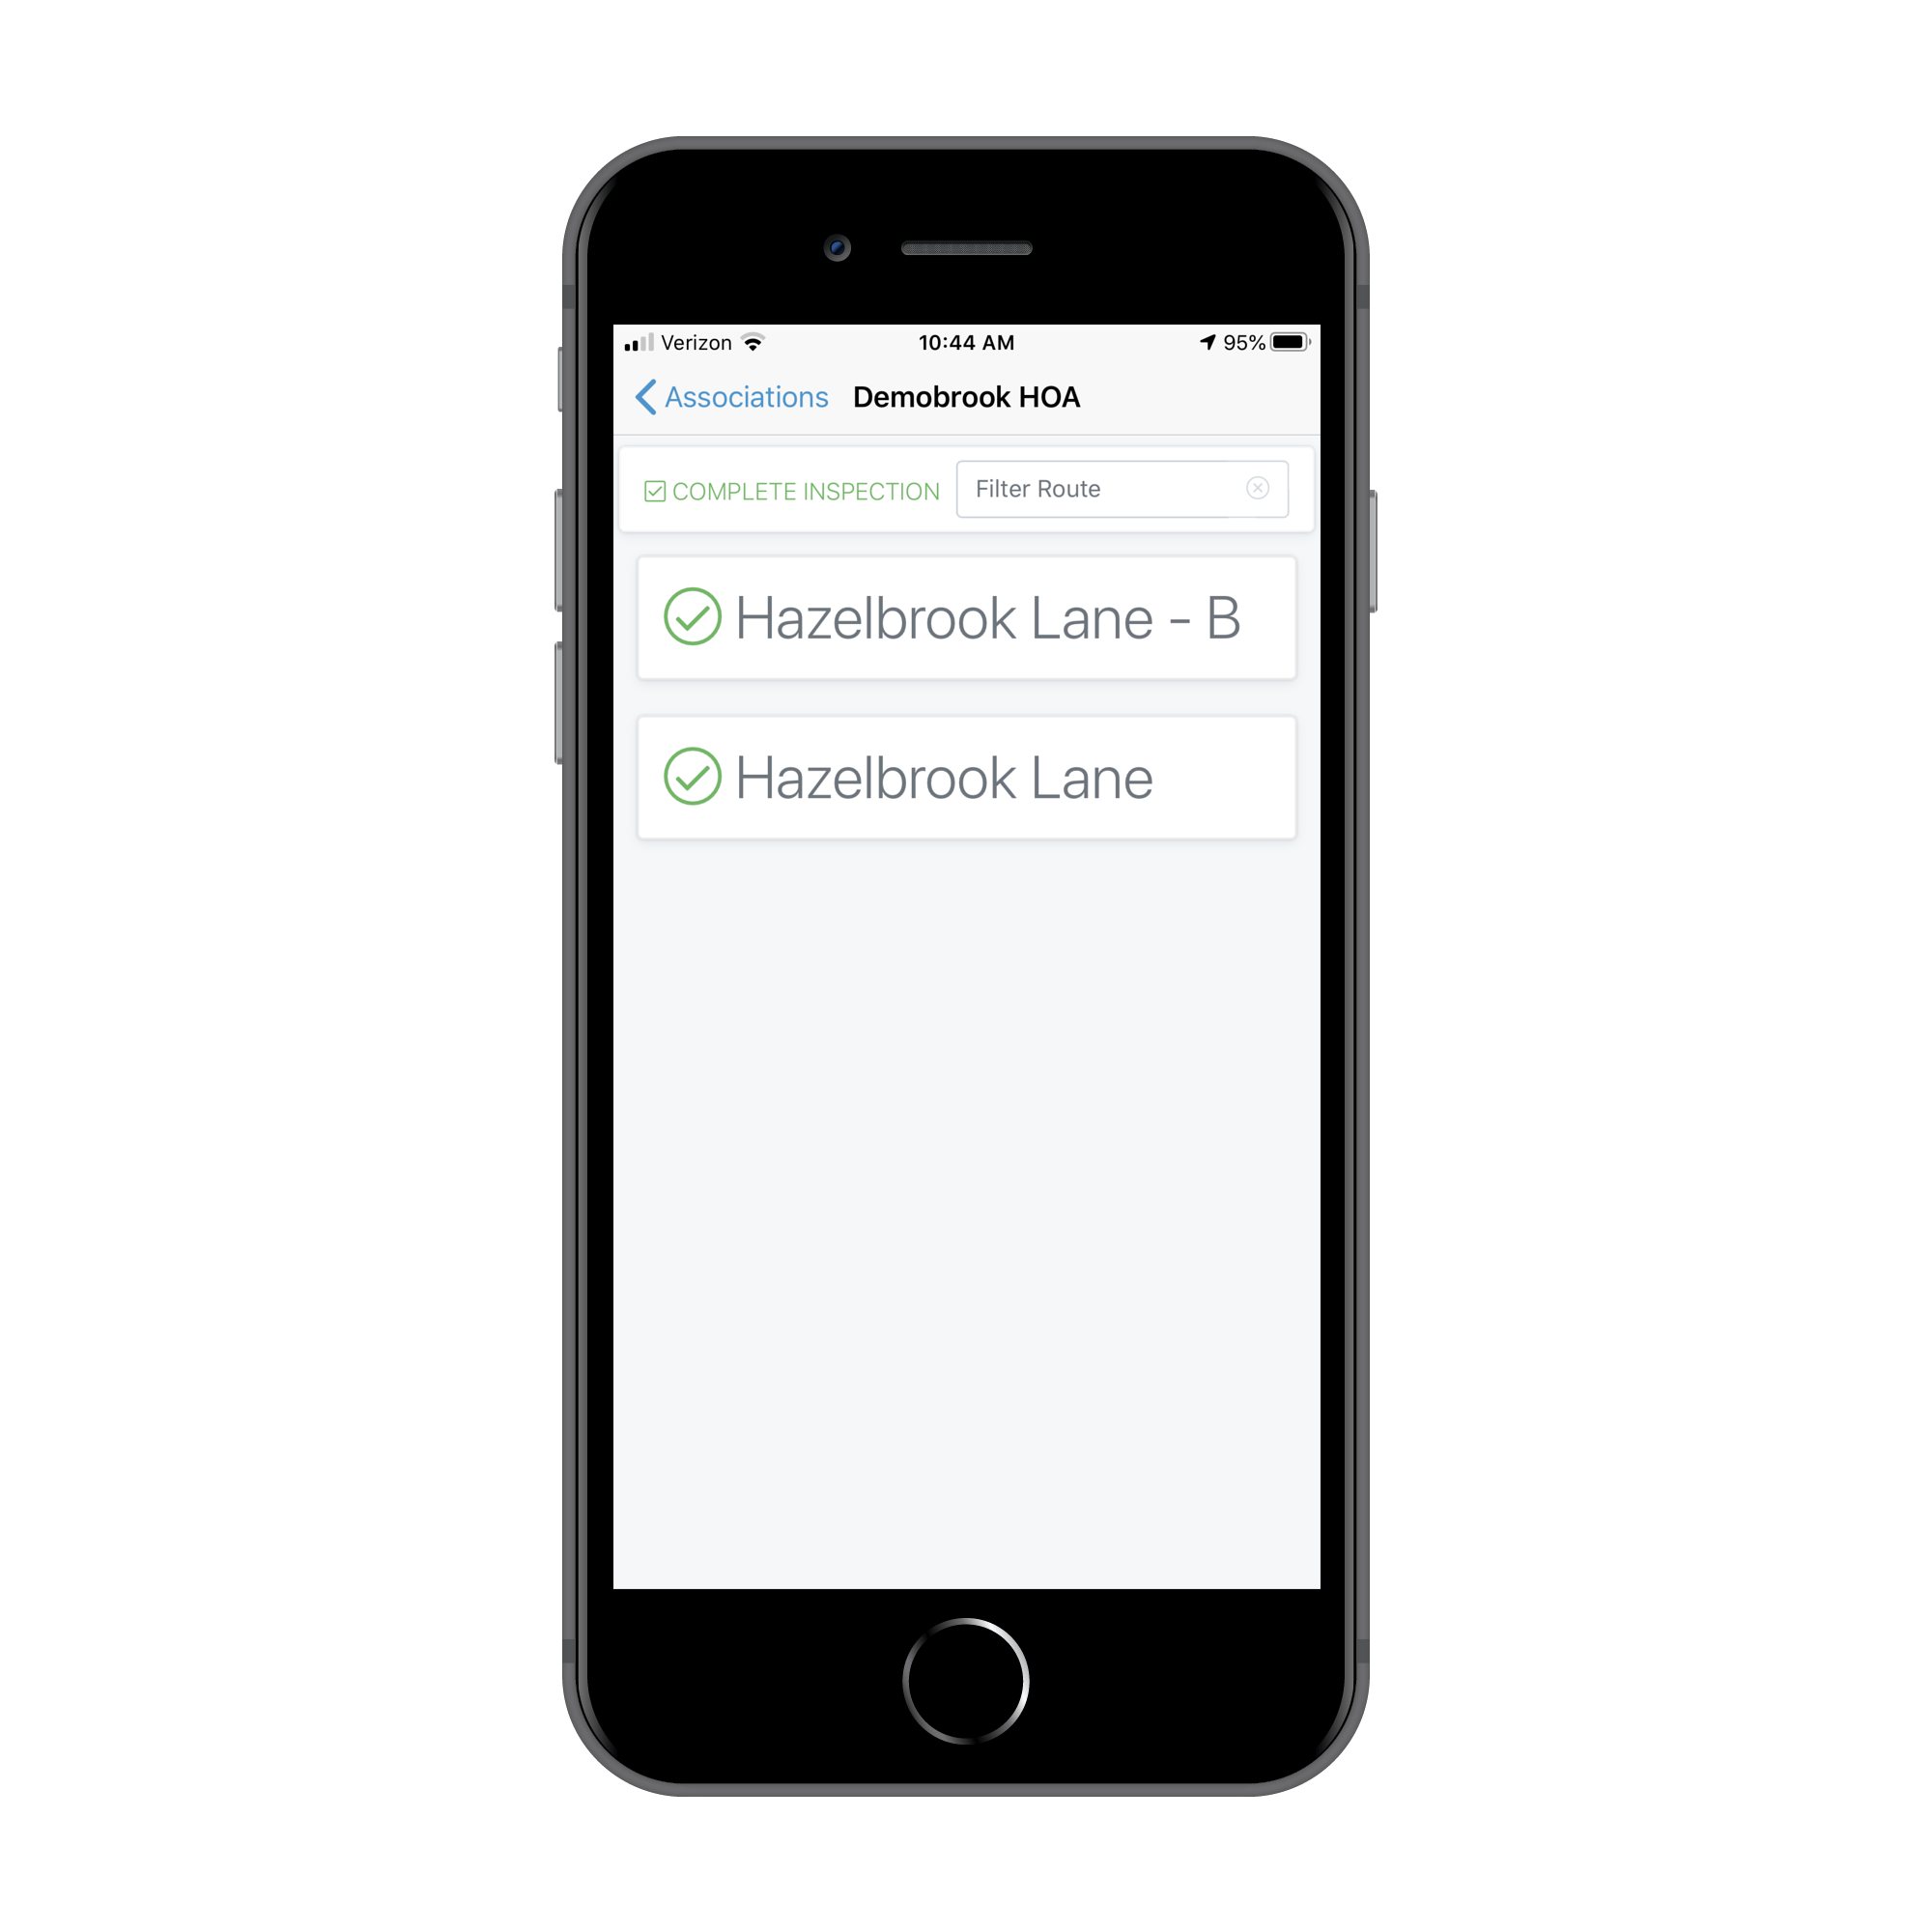
- Now you are back in the Association Queue.
- You can
Revise Inspectionor move on the the next step...Finalizing the inspection. 👇
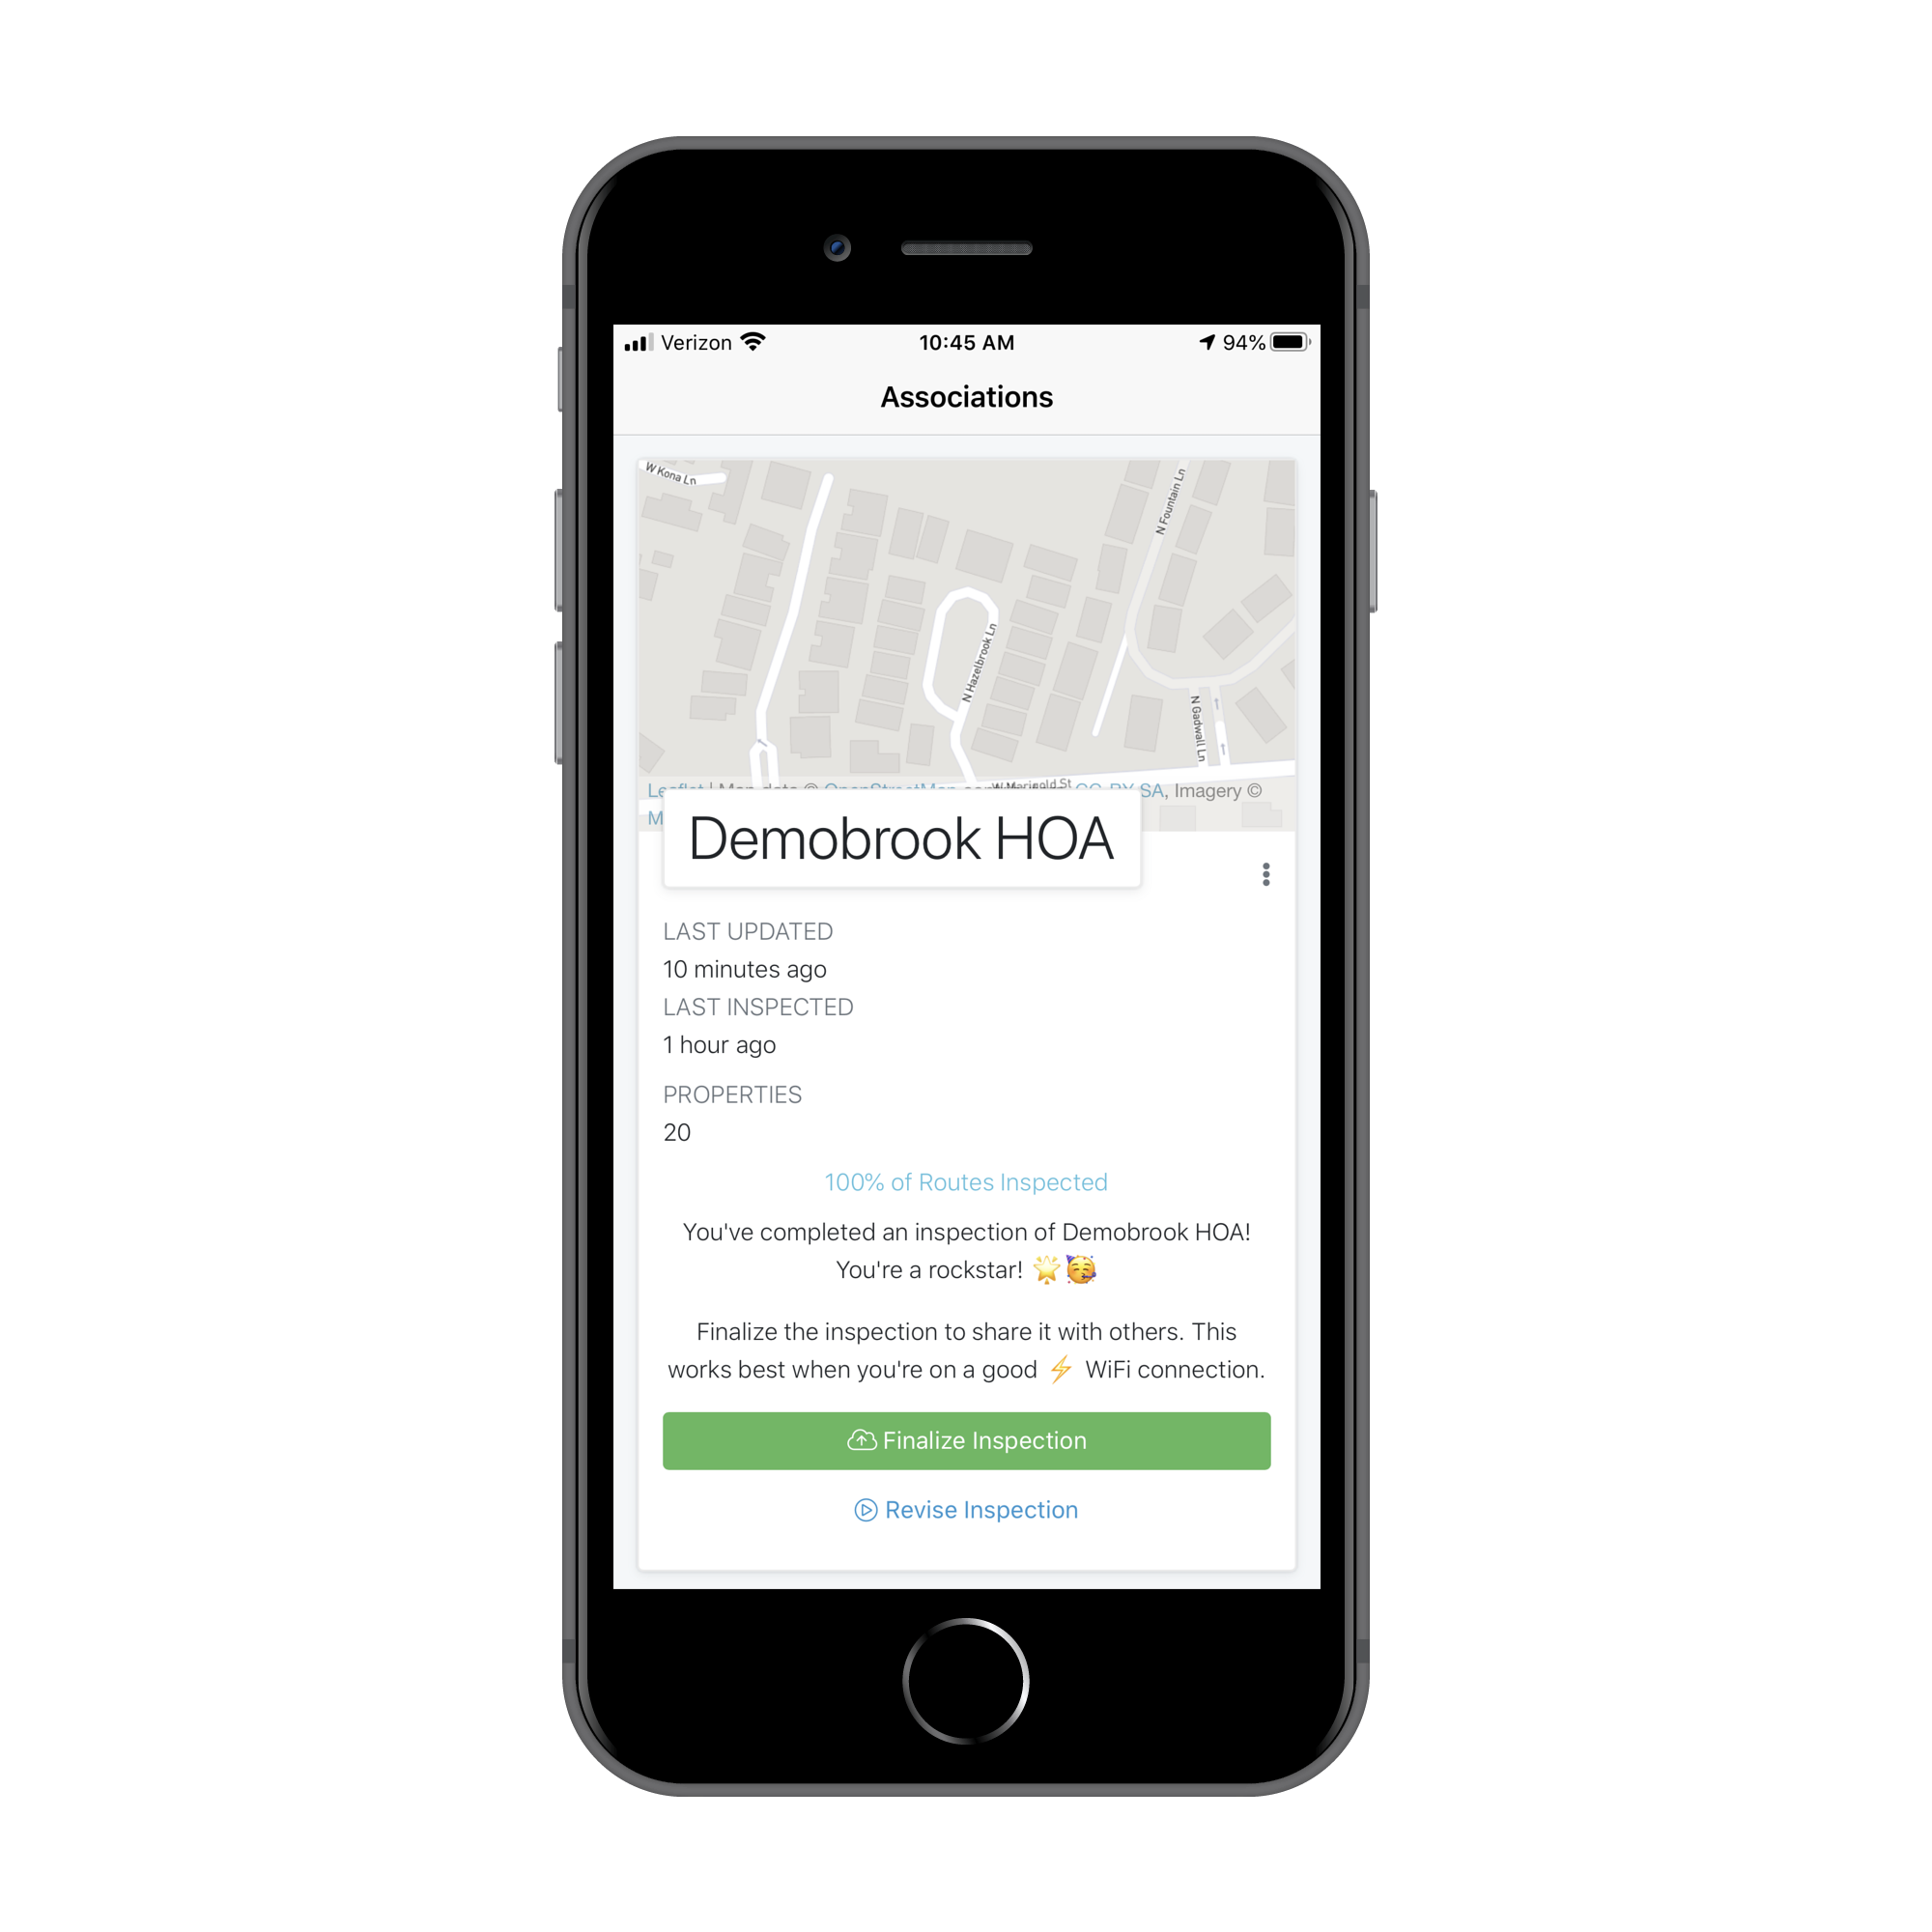
Step 3 - Finalizing Inspections
You did it! You completed your inspection and now it's time to finalize the inspection and get those violations into the Dashboard for delivery and reporting.
- From the Association Queue, any Associations with completed inspections will show the green
Finalize Inspectionbutton. Click this button to get the data from the inspection loaded into the Dashboard.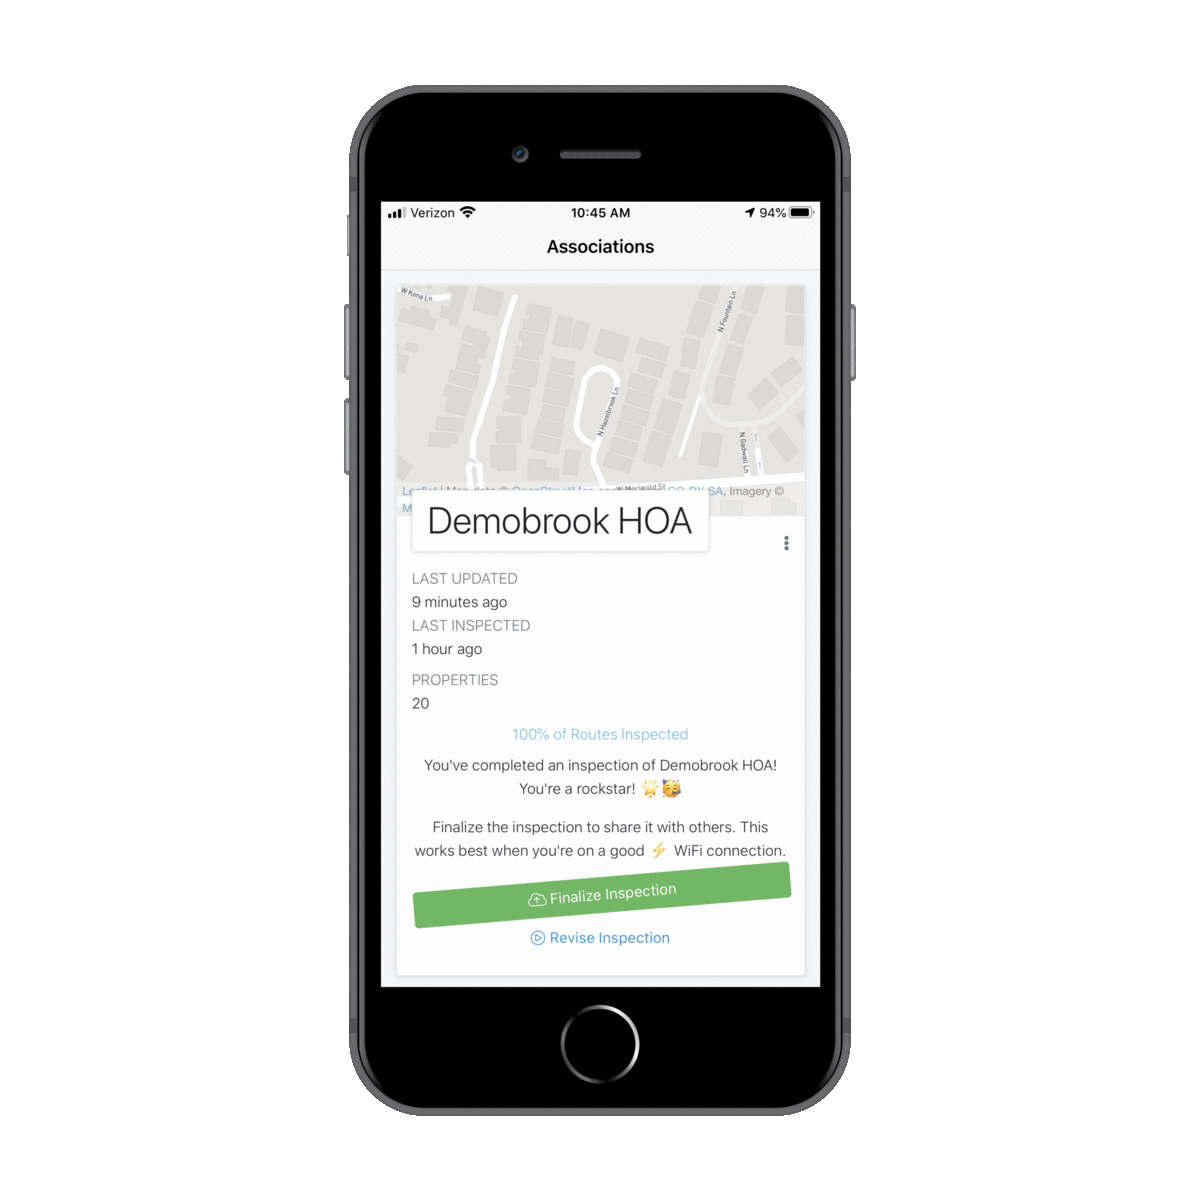
- You will be presented with the success screen upon successfully finalizing the inspection. To move on from here, click
Start a new inspection. - The Association just finalized will be removed from the Queue.
- Rinse, repeat, and rock on! 🤘